Maximizing Cardio: The Ultimate Guide to Stair Climbers

johnbowe.info – Cardiovascular exercise plays a critical role in maintaining a healthy lifestyle. Among the numerous cardio workouts available, stair climbing has emerged as one of the most efficient and effective exercises for improving heart health, boosting stamina, and burning calories. Whether you’re using a stair climber machine at the gym or climbing real stairs outdoors, this full-body workout targets your legs, core, and cardiovascular system in a way few other exercises can match. In this ultimate guide, we’ll explore how to maximize the benefits of stair climbing, from the different types of stair climbers to proper techniques, safety tips, and workout routines.

Understanding the Benefits of Stair Climbers

1.1 Full-Body Workout

Stair climbing is a functional, low-impact workout that engages multiple muscle groups simultaneously. While it primarily targets the lower body, including the quadriceps, hamstrings, glutes, and calves, it also provides a workout for your core and upper body. As you climb, your core has to engage to stabilize your body, and your arms can be used to pump and increase the intensity of the workout.

1.2 Cardiovascular Health

Stair climbing is an excellent cardiovascular workout, offering all the heart-pumping benefits of running or cycling but with less strain on your joints. The constant motion of climbing steps increases your heart rate, enhancing cardiovascular fitness and improving the efficiency of your heart and lungs. Research has shown that just 10 minutes of stair climbing can provide similar benefits to a brisk walk or jog.

1.3 Weight Loss and Fat Burning

Stair climbing is one of the most effective exercises for burning calories and fat. The intensity of the workout, combined with the use of multiple large muscle groups, makes it an ideal exercise for weight loss. In fact, stair climbing can burn up to 500 calories per hour, depending on your speed and intensity. By incorporating this exercise into your routine, you can efficiently shed excess body fat and boost metabolism.

1.4 Lower Body Strength and Endurance

Climbing stairs helps to strengthen the lower body muscles, especially the glutes, quads, hamstrings, and calves. By regularly using a stair climber or climbing real stairs, you’ll build muscle endurance, improve overall strength, and enhance muscle tone. This is especially beneficial for improving functional fitness, which can enhance your performance in other sports or physical activities.

Types of Stair Climbers

2.1 Stair Climber Machines

Stair climber machines are a staple at most gyms. They simulate the motion of climbing stairs but allow you to control the intensity. There are different types of stair climber machines, including:

  • Stairmaster (Stepper Machines): These machines have a rotating set of steps, creating a continuous climbing motion. You can adjust the speed and resistance to control the intensity of your workout.
  • Vertical Climbers: Vertical climbers mimic the action of climbing a ladder, offering a more intense workout that also engages the arms and core.
  • Treadmills with Stair Climbing Programs: Some treadmills come with stair-climbing programs, which involve increasing the incline to simulate stair climbing.

2.2 Outdoor Stair Climbers

If you prefer to take your workout outside, real stairs can offer a more dynamic environment. Stair climbing outdoors not only adds the challenge of varying step sizes and heights but also provides fresh air and scenic views. Whether you’re climbing the steps of a stadium, park, or urban building, outdoor stairs can elevate your workout and increase the intensity due to uneven terrain.

2.3 Portable Stair Climbers

Portable stair climbers are compact devices designed for home use. These machines often feature two pedals that simulate the movement of climbing stairs. They are great for those with limited space and can be used while watching TV or during a break at work.

Correct Technique for Stair Climbing

3.1 Posture Matters

To get the most out of your stair-climbing workout and avoid injury, it’s essential to maintain good posture throughout the exercise. Keep your back straight, your shoulders relaxed, and your core engaged. Avoid leaning forward or slouching, as this can put unnecessary strain on your lower back. Proper posture also helps to engage the right muscles, especially your glutes and quads.

3.2 Proper Foot Placement

Your foot placement plays a significant role in the effectiveness of your workout. When climbing, make sure you’re stepping flatly with your entire foot. Avoid using just the tips of your toes, as this can lead to discomfort and inefficient use of muscles. Ensure that each step is completed with a full extension of your legs, which will engage the hamstrings and glutes more effectively.

3.3 Arm Movement

To boost your workout intensity, use your arms. Pumping your arms as you climb helps to engage your upper body, making it a full-body workout. You can hold onto the handrails if you’re using a stair climber machine, but be sure not to rely on them too heavily. If you’re climbing real stairs, use your arms for balance and momentum, but avoid leaning on the railing.

Safety Tips for Stair Climbers

4.1 Start Slowly

If you’re new to stair climbing or haven’t exercised in a while, start with a moderate pace to prevent injury. Begin with short intervals, gradually increasing the time and intensity as your body adapts. Overdoing it too soon can lead to muscle strain or fatigue.

4.2 Wear Proper Footwear

Comfortable, supportive footwear is crucial for a safe stair-climbing workout. Choose shoes with a good grip and cushioning to absorb the impact of each step. Avoid wearing sandals or flip-flops, as they provide minimal support and can cause instability while climbing.

4.3 Listen to Your Body

It’s essential to listen to your body during any exercise, including stair climbing. If you experience pain or discomfort, stop immediately and assess what might be causing the issue. Push yourself, but not to the point of injury. If you’re working on building stamina, remember that consistency is key.

4.4 Hydrate

Like any form of cardio exercise, stair climbing will make you sweat. Be sure to drink plenty of water before, during, and after your workout to stay hydrated. Dehydration can hinder performance and cause fatigue, so make hydration a priority.

Stair Climber Workout Routines

5.1 Beginner Routine

For beginners, it’s best to start with a lower intensity and gradually build up your endurance. Here’s a simple beginner routine:

  • Warm-up: 5 minutes of light stair climbing at a slow pace.
  • Workout: 15 minutes of steady-paced climbing at a moderate pace.
  • Cool-down: 5 minutes of light stair climbing at a slow pace, followed by stretching.

5.2 Intermediate Routine

As you build stamina and strength, you can increase the intensity with an intermediate routine:

  • Warm-up: 5 minutes of light stair climbing.
  • Workout: 3 sets of 3 minutes of fast stair climbing, followed by 1-minute rest in between.
  • Cool-down: 5 minutes of light stair climbing.

5.3 Advanced Routine

For advanced users, incorporate high-intensity intervals to challenge yourself:

  • Warm-up: 5 minutes of light stair climbing.
  • Workout: 5 sets of 2 minutes of fast stair climbing, followed by 30-second rest periods.
  • Cool-down: 5 minutes of light stair climbing.

5.4 Endurance Challenge

Test your endurance with a long-duration stair-climbing workout:

  • Warm-up: 5 minutes of light stair climbing.
  • Workout: 30-45 minutes of moderate to intense stair climbing.
  • Cool-down: 5 minutes of light stair climbing and stretching.

Conclusion

Stair climbing is an accessible, high-intensity cardio workout that can improve your cardiovascular health, build strength, and help you lose weight. Whether you’re using a stair climber machine or climbing real stairs, incorporating this exercise into your fitness routine offers numerous benefits for your overall health and well-being. By maintaining proper form, setting realistic goals, and following a structured workout routine, you can maximize the effectiveness of your stair climbing sessions. So, take the stairs whenever possible and elevate your fitness to new heights!

The Ultimate Guide to Choosing the Perfect Stationary Bike

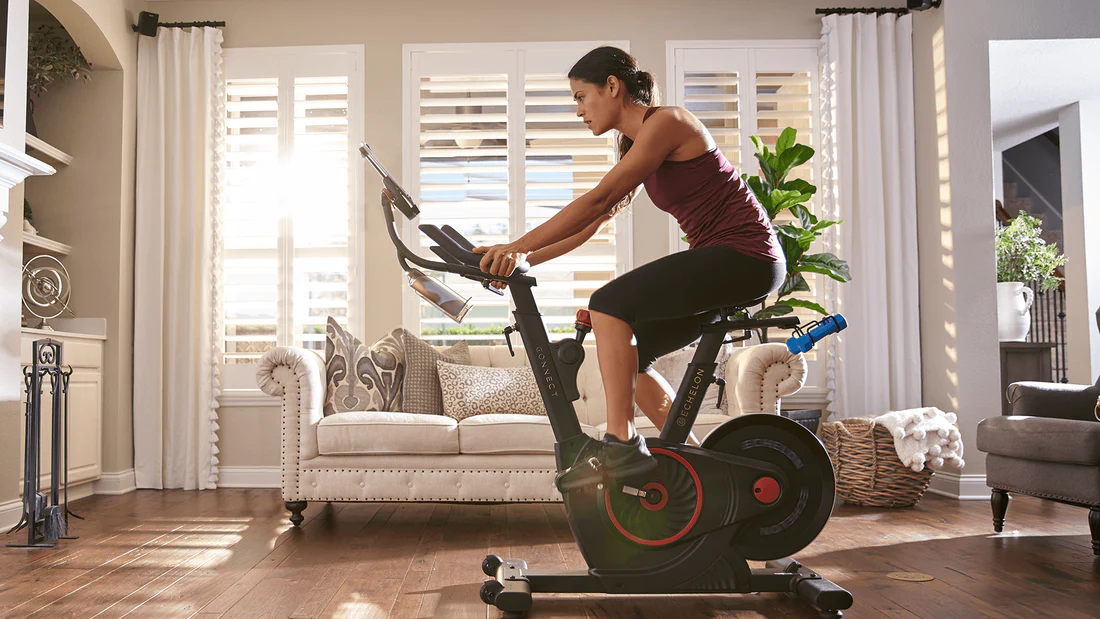
johnbowe.info – When it comes to fitness, stationary bikes are one of the most popular options for indoor cycling. Whether you want to enhance your cardiovascular health, burn calories, or enjoy a low-impact workout, a stationary bike can be a great choice. However, with so many different types and models available in the market, selecting the perfect stationary bike for your needs can feel overwhelming. In this comprehensive guide, we will walk you through the different types of stationary bikes, key features to consider, and tips for choosing the best one for your personal goals and preferences.

Types of Stationary Bikes

Before diving into the features and specifications, it’s important to understand the different types of stationary bikes available. Each type has its own set of benefits and can cater to different fitness goals and comfort levels.

1. Upright Bikes

Upright bikes are the most traditional form of stationary bikes. These are designed to mimic the feel of a regular bicycle, with a more vertical riding position. The pedals are positioned directly below the rider’s body, and you hold onto handlebars for support. Upright bikes are great for people who enjoy cycling outdoors or want to target their quads and calves while engaging in a higher-intensity workout.

Pros:

  • Provides a natural, outdoor biking experience
  • Targets leg muscles, particularly the quads and calves
  • Compact and easy to store
  • Can provide a great cardiovascular workout

Cons:

  • May be uncomfortable for people with back issues
  • Can put more strain on the knees for certain individuals

2. Recumbent Bikes

Recumbent bikes are designed with a larger seat and a backrest, which provides more support for the lower back. On a recumbent bike, you pedal in a more reclined position, with your legs extended in front of you rather than directly beneath you. This makes them a great choice for people with joint problems, back issues, or those looking for a more comfortable cycling experience.

Pros:

  • Comfortable seat with back support
  • Low-impact, gentle on the knees and joints
  • Ideal for people with back pain or those new to exercise
  • Easier to get on and off due to low height

Cons:

  • Takes up more space than an upright bike
  • May not provide as intense of a workout for the core and legs

3. Spin Bikes

Spin bikes, also known as indoor cycling bikes, are built for high-intensity workouts. They have a design similar to an outdoor racing bike, with a heavy flywheel and adjustable resistance. Spin bikes are ideal for those who are serious about cycling or want to engage in interval training and spin classes.

Pros:

  • High-intensity workout that targets the entire body
  • Adjustable resistance for more control over workout intensity
  • Excellent for interval training and calorie burning

Cons:

  • Can be uncomfortable for long rides
  • May require a bit of a learning curve for beginners
  • The seat may not be as comfortable for some users

4. Dual-Action Bikes

Dual-action bikes are designed to offer both an upper and lower body workout. These bikes have handlebars that move with your pedaling motion, engaging your arms and shoulders along with your legs. Dual-action bikes are ideal for individuals looking to incorporate full-body workouts and increase calorie burn.

Pros:

  • Full-body workout, engaging both arms and legs
  • Great for overall fitness and calorie burning
  • Suitable for users with limited time to exercise

Cons:

  • Can be difficult to balance and master for beginners
  • Less effective for those who want to focus solely on their legs

Key Features to Consider

Once you’ve decided on the type of stationary bike that suits your needs, it’s time to think about the features that matter most to you. Below are some essential features to look for when choosing a stationary bike.

1. Resistance Mechanism

The resistance mechanism is an important factor when choosing a stationary bike, as it directly impacts the intensity of your workout. There are typically two types of resistance mechanisms:

  • Magnetic Resistance: Magnetic resistance is smooth and quiet. It uses magnets to create resistance, and many bikes with magnetic resistance offer adjustable levels that can be controlled easily with buttons or knobs.
  • Friction Resistance: This type uses a brake pad to create resistance against the flywheel. While it can be more affordable, friction resistance bikes tend to be noisier and may require more maintenance over time.

Consider your preference for noise level, maintenance, and the type of workout you want when selecting your bike’s resistance.

2. Comfort and Adjustability

Comfort is crucial, especially if you plan on spending long periods on the bike. Look for bikes with adjustable seats, handlebars, and pedals. Ideally, the seat should be adjustable for height and distance from the handlebars to ensure proper posture. A comfortable, padded seat can make a big difference in your overall workout experience.

  • Upright bikes generally have narrow seats that can be uncomfortable for some users. You may want to look for models with padded seats or consider investing in a padded seat cover.
  • Recumbent bikes typically have larger, more cushioned seats, but make sure to check for adjustability and adequate lumbar support.

3. Display Console and Features

Modern stationary bikes come equipped with digital display consoles that provide useful workout data such as time, speed, distance, heart rate, and calories burned. Some bikes also have built-in workout programs and connectivity features like Bluetooth for syncing with fitness apps, heart rate monitors, or music systems.

Consider the type of feedback you need during your workout. If you enjoy tracking your progress or prefer pre-programmed workouts, look for bikes with advanced consoles and features. For a simpler experience, choose a model with basic metrics.

4. Weight Capacity

Every bike has a maximum weight capacity, and it’s important to ensure that the bike you choose can support your weight. While most bikes can handle 250-300 pounds, heavier-duty models may support up to 400 pounds or more. Always check the weight capacity before making a purchase, especially if you’re on the heavier side.

5. Stability and Durability

A stationary bike should be stable and durable enough to handle intense workouts. Look for bikes with a solid frame, preferably made from steel or heavy-duty materials. A sturdy bike will minimize wobbling, especially during high-intensity sessions. Additionally, check for features like wide, non-slip pedals and adjustable stabilizers to prevent the bike from shifting during use.

6. Noise Level

If you plan on using your bike at home, you’ll want to consider the noise level. While all bikes make some noise, magnetic resistance bikes tend to be quieter than their friction-based counterparts. Spin bikes and dual-action bikes can also be noisy due to the movement of the flywheel and handlebars, so make sure to test the noise level if possible.

7. Storage and Size

Consider the space available in your home when choosing a stationary bike. Some bikes are more compact and easy to store, while others may require a dedicated space due to their larger size. If space is limited, look for foldable models that can be easily stored when not in use.

Conclusion

Choosing the perfect stationary bike involves considering your fitness goals, physical condition, and the features that matter most to you. Whether you opt for an upright bike, a recumbent bike, a spin bike, or a dual-action model, make sure to prioritize comfort, adjustability, and the type of workout you want to achieve. With the right bike, you can enjoy a rewarding and effective workout experience in the comfort of your own home.

By keeping in mind the key factors outlined in this guide, you’ll be well on your way to finding the perfect stationary bike to match your needs and help you achieve your fitness goals. Happy cycling!

The Comprehensive Guide to Balance Boards

johnbowe.info – Balance boards are versatile fitness tools that have gained significant popularity due to their effectiveness in improving balance, stability, and coordination. These boards come in various designs and sizes, but their primary function remains the same: to challenge the user’s balance by forcing them to stabilize their body while standing on a shifting or unstable surface. This article delves into the benefits, types, usage tips, and the science behind balance boards.

What Are Balance Boards?

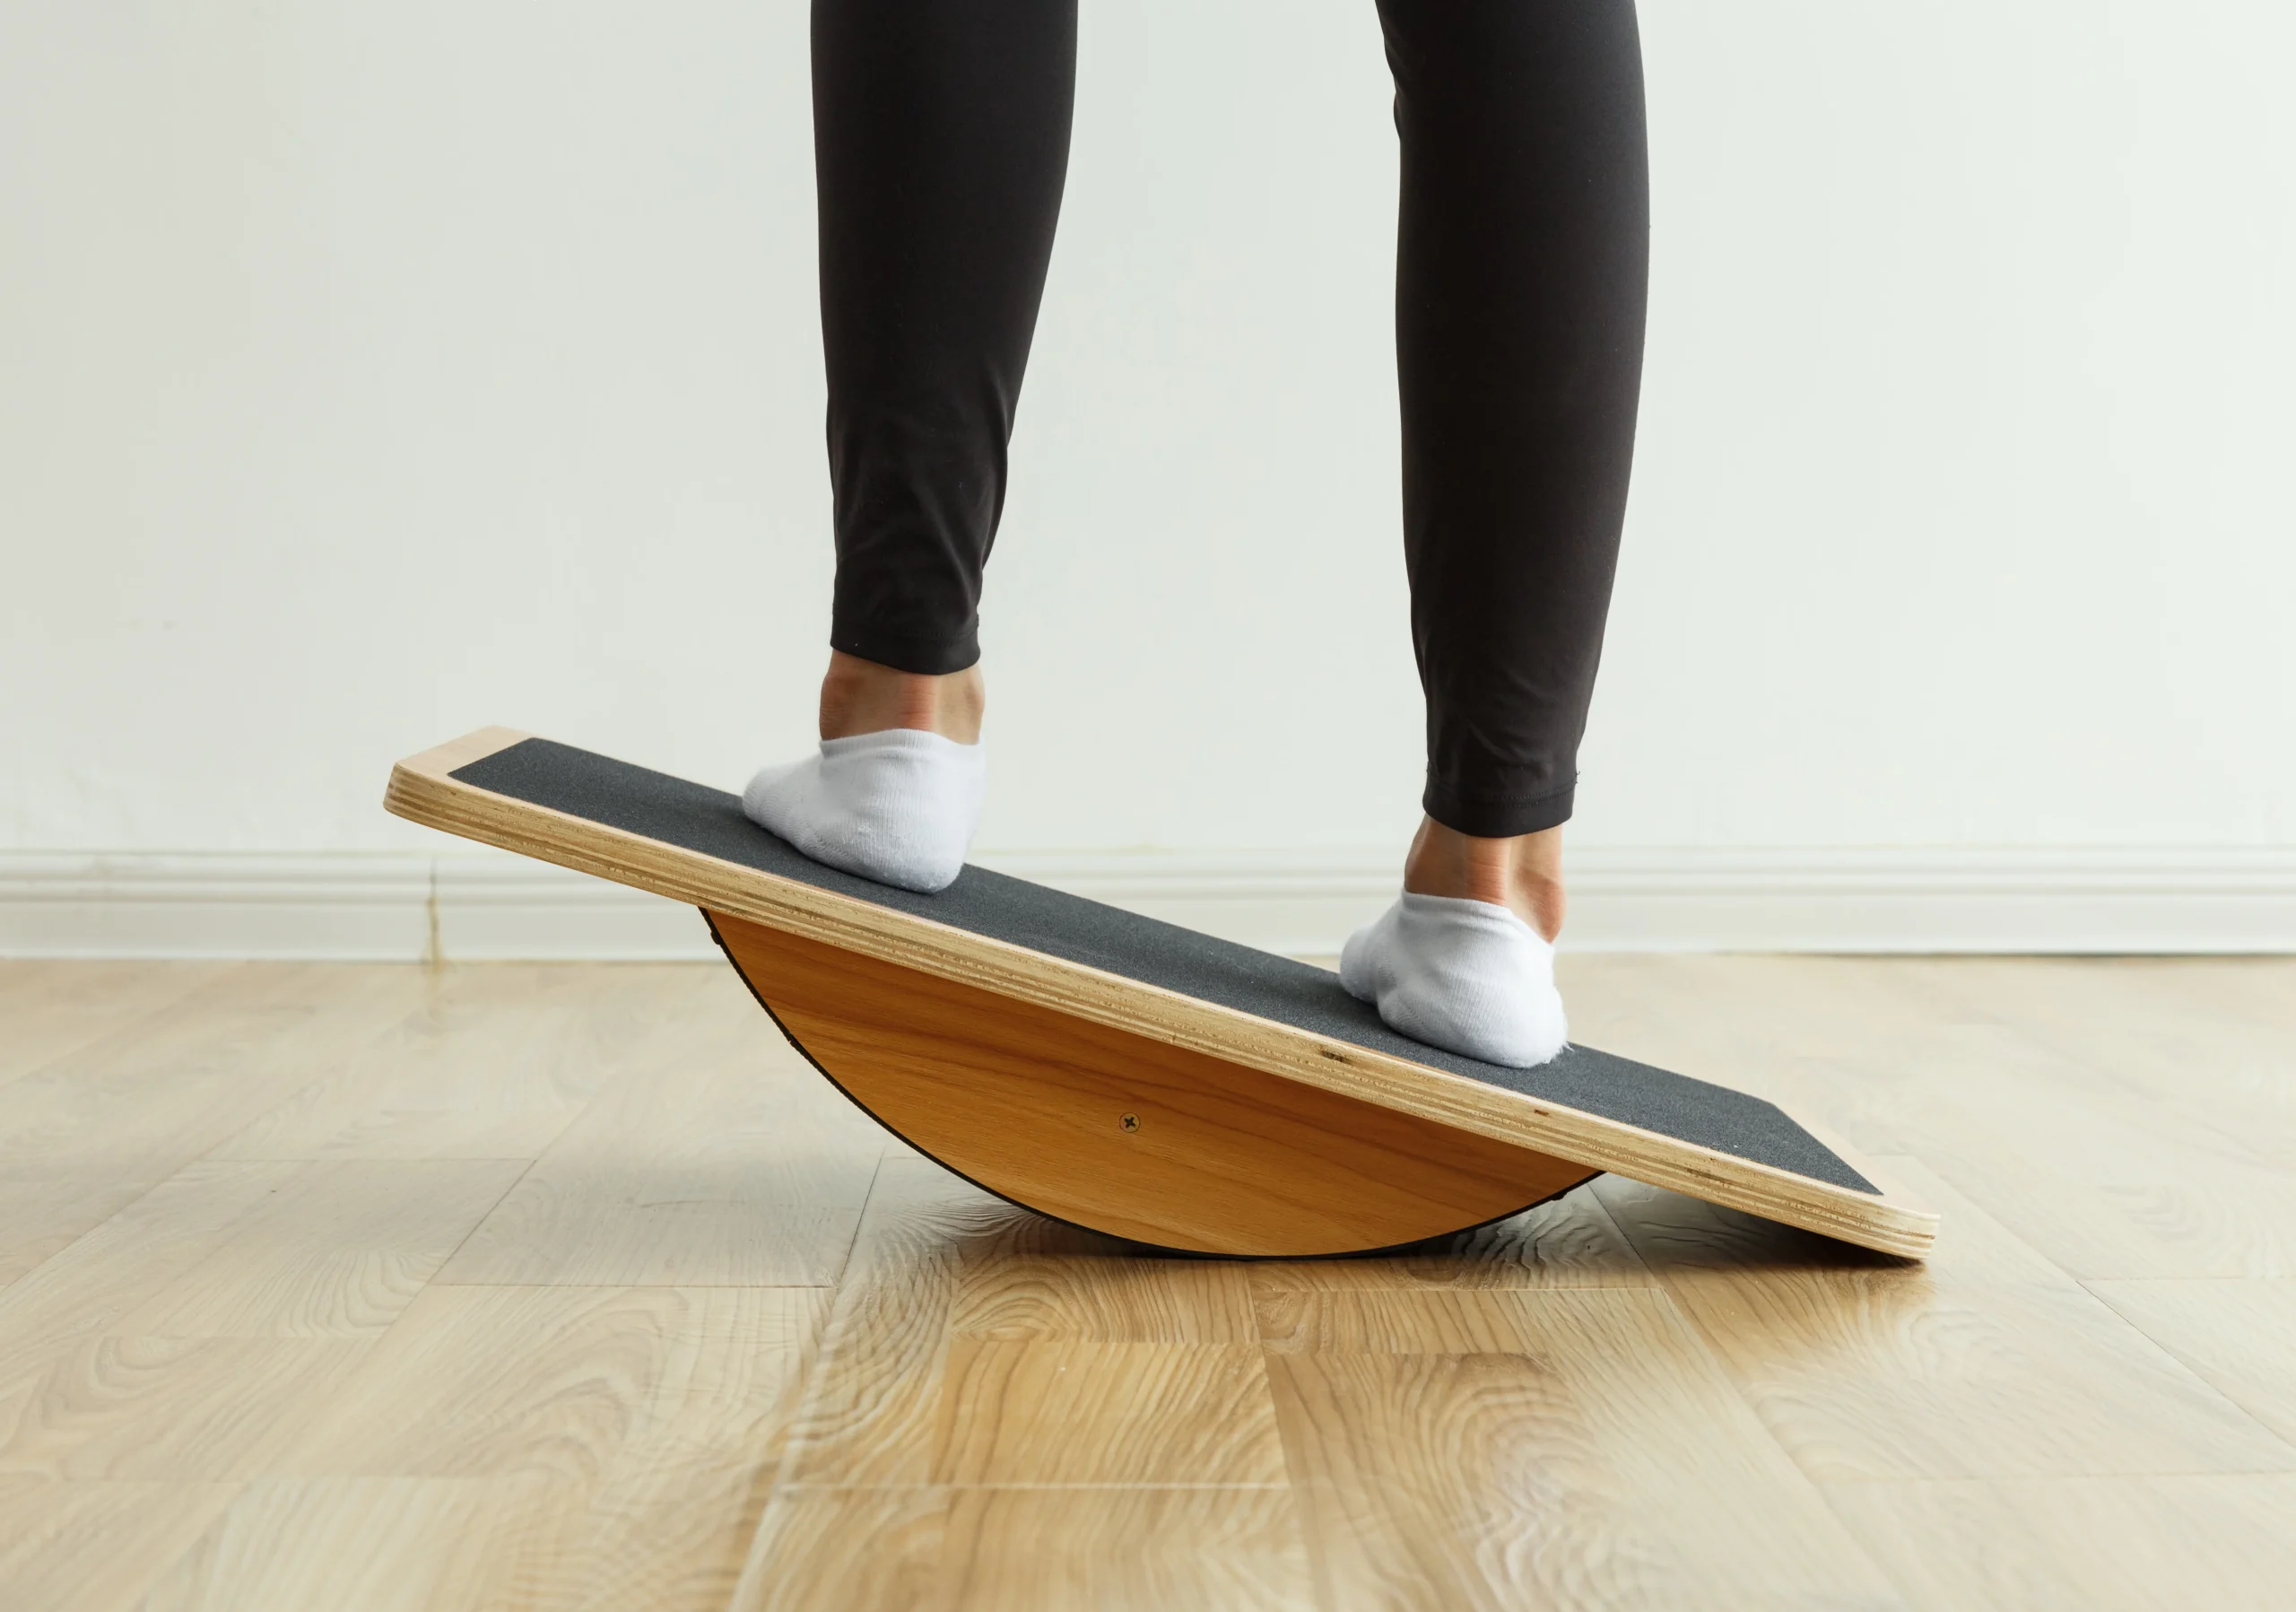
A balance board, also known as a wobble board or stability board, is a piece of equipment used for training purposes to improve balance, coordination, and overall fitness. Typically, it consists of a flat platform placed on a rounded base or a half-sphere, creating an unstable surface. This instability forces the user to engage their core muscles and other stabilizer muscles to maintain balance.

Balance boards are often used by athletes to enhance their performance, as well as by individuals in rehabilitation to improve their motor control and prevent injury. They can be used in various exercises, from simple standing exercises to more advanced movements like squats, lunges, or push-ups.

The Evolution of Balance Boards

Balance boards have existed in some form for centuries. Early versions were used by indigenous cultures to develop physical prowess and balance for activities such as surfing, snowboarding, and other outdoor sports. The modern balance board, however, has become widely popular as part of a more structured fitness regimen. The use of balance training has become increasingly recognized in physical therapy, injury prevention, and overall fitness.

Benefits of Using a Balance Board

Balance boards provide a range of physical and mental benefits. They are not only useful for professional athletes but also for people seeking to enhance their everyday physical performance.

1. Improved Core Strength

The most prominent benefit of using a balance board is its ability to engage the core muscles. The instability of the board forces users to activate their abdominal muscles, lower back, and obliques to stay balanced. Over time, this leads to enhanced core strength, which is essential for overall fitness, posture, and injury prevention.

2. Enhanced Stability and Coordination

Balance training on a board improves your body’s ability to react to unstable situations. Whether it’s navigating uneven terrain or adjusting to sudden changes in posture, practicing on a balance board helps your body develop better coordination between the brain and muscles. This improvement in proprioception (awareness of body position) can translate into better performance in sports and day-to-day activities.

3. Rehabilitation and Injury Prevention

Balance boards are commonly used in physical therapy for rehabilitation after injuries, especially lower limb injuries like sprained ankles or knee injuries. The board helps patients regain their balance and stability while also strengthening muscles that may have weakened during the recovery process. Additionally, strengthening the muscles around the joints can reduce the likelihood of future injuries.

4. Boosted Flexibility and Mobility

While not the primary focus of balance boards, flexibility and mobility can be improved through consistent use. Certain exercises on the balance board, such as squats and lunges, can stretch and lengthen muscles, increasing joint mobility and muscle flexibility.

5. Mental Focus and Concentration

The challenge of maintaining balance requires concentration, focus, and mindfulness. Regularly using a balance board helps to improve mental clarity and the ability to focus, which can benefit other areas of life, such as work, study, or other physical activities.

Types of Balance Boards

Not all balance boards are created equal. Different types serve different needs, depending on the fitness goals, experience level, or rehabilitation requirements of the user.

1. Wobble Boards

Wobble boards are one of the most common types of balance boards. They consist of a flat surface with a rounded bottom, which allows the platform to tilt in all directions. This design makes wobble boards ideal for beginners and those looking to improve their overall balance. They are widely used for basic stability exercises and rehabilitation.

2. Roller Boards

Roller boards feature a flat platform that sits atop a cylindrical roller. This design is typically more challenging than the wobble board, as it requires the user to maintain balance while rolling the platform forward or backward. Roller boards are often used by more advanced users, such as surfers, skateboarders, or snowboarders, to simulate the movements and balance required in these sports.

3. Rocker Boards

Rocker boards are similar to wobble boards but with a flatter bottom, often curved slightly. They allow tilting in one direction (usually forward and backward). Rocker boards are frequently used in rehabilitation programs and by beginners, as they provide a more controlled and stable movement than wobble boards.

4. Balance Discs

Balance discs are inflatable, round cushions that can be placed on the floor or used in conjunction with a chair. They are often used for seated balance training or as a tool to enhance posture. By sitting on a balance disc, users engage their core muscles to maintain an upright position, which can improve core strength and balance over time.

How to Use a Balance Board

Using a balance board effectively requires some basic steps and guidelines to ensure safety and maximize its benefits.

1. Start Slowly

If you’re new to balance training, begin with a beginner-friendly board, such as a wobble board or rocker board. Start with simple exercises like standing on the board with both feet and holding the position for 30 seconds to a minute. Gradually increase the duration as your balance improves.

2. Focus on Form

It’s crucial to maintain proper form while using a balance board. Keep your knees slightly bent, engage your core, and maintain an upright posture. Avoid locking your knees, as this can strain your joints and reduce the effectiveness of the exercise.

3. Integrate Into Your Workout Routine

Balance training shouldn’t be limited to standing exercises. Once you feel confident, integrate the balance board into more dynamic movements such as lunges, squats, push-ups, or planks. These exercises provide a full-body workout while challenging your stability.

4. Include Short Sessions Daily

For the best results, include short balance board sessions into your daily routine. Ten to twenty minutes a day is often enough to experience improvements in balance and coordination.

Safety Tips for Using a Balance Board

While balance boards are generally safe, using them correctly is essential to avoid injury. Here are a few safety tips:

  1. Warm-up First: Always warm up before using a balance board to reduce the risk of muscle strains or sprains. Dynamic stretches or light cardio will prepare your muscles for the work ahead.
  2. Use a Soft Surface: Practice on a soft surface like a carpet or mat to cushion any falls. Hardwood floors or concrete can increase the risk of injury if you lose balance.
  3. Start with Support: If you’re a beginner, stand near a wall, countertop, or sturdy object to help you regain balance if necessary.
  4. Progress Gradually: Don’t rush into more complex exercises. Allow your body to adapt to the challenge and increase intensity as you become more comfortable.

Conclusion

Balance boards are fantastic tools for enhancing balance, coordination, and overall physical fitness. Whether you are an athlete looking to improve your performance, someone recovering from an injury, or simply trying to incorporate fun and effective training into your routine, balance boards offer a wide range of benefits. By selecting the right type of board and integrating balance training into your fitness regimen, you can significantly improve your posture, core strength, and even mental focus.

Make sure to start slow, practice proper form, and most importantly, have fun while using a balance board. As you grow stronger and more confident, you’ll be amazed at how much your balance improves, not just on the board, but in all areas of life.

The Smith Machine: A Guide to Its Use, Benefits, and Safety

johnbowe.info – The Smith Machine is one of the most popular pieces of equipment found in gyms worldwide. It has earned its place in the fitness industry due to its ability to support weight training for individuals of all experience levels. Whether you’re a beginner or an advanced lifter, the Smith Machine offers various benefits that can enhance your strength training routine. This article will provide an in-depth look at the Smith Machine, including its mechanics, advantages, disadvantages, and the best exercises you can do with it.

What is a Smith Machine?

The Smith Machine is a piece of gym equipment designed for weight training. It consists of a barbell fixed within steel rails, allowing it to move vertically with limited horizontal movement. This setup provides more stability compared to a free-weight barbell, which can move in any direction. The barbell in a Smith Machine is often counterbalanced by weights or a pulley system, making it easier to lift heavy loads with controlled movement.

The History of the Smith Machine

The Smith Machine was invented by Rudy Smith, an American fitness trainer, in the early 1950s. Smith’s goal was to create a safer and more controlled way for lifters to perform exercises, particularly squats and bench presses, without the need for a spotter. Over time, the Smith Machine evolved from a novelty item in gyms to a standard piece of gym equipment that many athletes use regularly. Today, Smith Machines come in various models with different features, such as adjustable angles and counterbalance systems.

How the Smith Machine Works

The Smith Machine is engineered to guide the barbell’s motion vertically along two tracks, offering stability and safety. Unlike free weights, which require the lifter to control the balance and direction of the bar, the Smith Machine’s fixed rails control the movement pattern, offering more guidance. While the barbell is restricted to vertical movement, the machine allows the user to adjust the bar’s height and the safety stoppers, preventing the bar from falling too low.

Key Components of a Smith Machine

  1. Barbell: The main component of the Smith Machine, often counterbalanced to make lifting easier.
  2. Rails/Guides: Steel rails that restrict the bar’s movement to a vertical plane.
  3. Safety Stops: Adjustable mechanisms that prevent the barbell from descending below a certain point, ensuring safety during the exercise.
  4. Weight Rests: Located at the top or sides of the machine, these are where the weights are loaded and unloaded.
  5. Locking Mechanism: A safety feature that allows users to lock the barbell in place when not in use.

Benefits of Using the Smith Machine

The Smith Machine offers several advantages that make it a valuable addition to any strength training regimen. It can enhance both beginner and advanced lifters’ ability to perform various exercises safely and effectively.

1. Increased Stability

One of the most significant benefits of the Smith Machine is the increased stability it provides. The fixed barbell helps lifters maintain a controlled movement path, reducing the risk of injury due to improper form or muscle imbalances. This stability makes the Smith Machine ideal for beginners who are still learning proper lifting techniques.

2. Safer Weight Training

Unlike free weights, which require spotters or a great deal of focus on balancing the weight, the Smith Machine allows lifters to perform exercises with reduced risk. The fixed path and safety stops prevent the barbell from falling, which is especially beneficial when lifting heavy weights or attempting new exercises.

3. Versatility of Exercises

While the Smith Machine is commonly associated with squats and bench presses, it can be used for a wide variety of exercises. These include deadlifts, lunges, overhead presses, and more. The machine’s fixed barbell allows for both upper and lower body exercises, making it an excellent tool for full-body training.

4. Helps with Form and Technique

The guided motion of the Smith Machine can be especially helpful for beginners or individuals recovering from an injury. Since the barbell moves on a fixed path, it helps users focus on their form without worrying about stability. This is important for isolating specific muscles and performing exercises with proper technique.

Common Exercises Performed on the Smith Machine

The Smith Machine offers a wide range of exercises that target different muscle groups. Here are some of the most popular exercises that can be performed on the machine:

1. Smith Machine Squats

The Smith Machine squat is a variation of the traditional squat, where the barbell is placed on the shoulders and guided along the rails. This exercise primarily targets the quadriceps, hamstrings, glutes, and lower back. The added stability of the Smith Machine allows for more focus on the legs, reducing the risk of injury.

2. Smith Machine Bench Press

The Smith Machine bench press is similar to the regular bench press but with the added security of the fixed barbell. This exercise primarily targets the chest, shoulders, and triceps. The machine allows for a controlled range of motion, making it ideal for those new to bench pressing or those recovering from shoulder injuries.

3. Smith Machine Deadlifts

Deadlifts performed on the Smith Machine can be a great alternative for those who struggle with balance and coordination during conventional deadlifts. The fixed motion path can help lifters maintain proper form and focus on the posterior chain (back, glutes, and hamstrings).

4. Smith Machine Overhead Press

This is a shoulder exercise where the barbell is pressed overhead, working the deltoids, upper chest, and triceps. The Smith Machine allows for a stable motion path, reducing the risk of injury to the shoulder joint.

5. Smith Machine Lunges

Lunges on the Smith Machine can help to isolate the quads, glutes, and hamstrings. By holding the barbell on the shoulders, the machine provides a stable base of support while you lunge forward, backward, or laterally.

Disadvantages of the Smith Machine

While the Smith Machine offers several benefits, it also comes with some drawbacks that should be considered when incorporating it into your workout routine.

1. Lack of Core Engagement

Since the Smith Machine stabilizes the weight for you, it does not require as much engagement from the core muscles as free weights. The lack of a need to balance the weight reduces the overall challenge to your core, potentially hindering its development. Free-weight exercises require more stabilizing muscles, which can lead to more functional strength.

2. Limited Movement Pattern

While the Smith Machine guides the bar along a fixed path, this restriction might limit the natural movement pattern of certain exercises. For example, during a squat or bench press, some lifters may prefer more freedom of movement, which a Smith Machine does not provide.

3. Potential for Overuse

Relying too heavily on the Smith Machine can lead to muscle imbalances or prevent the development of important stabilizing muscles. It’s essential to use the Smith Machine as a supplement to free-weight exercises rather than as the sole method of strength training.

Safety Considerations When Using the Smith Machine

Though the Smith Machine is often considered safer than free weights, there are still important safety tips to keep in mind.

1. Proper Setup and Adjustments

Before starting any exercise on the Smith Machine, make sure to adjust the bar to the correct height and set the safety stops to an appropriate level. This will help prevent injury if you need to stop the exercise suddenly or if the barbell gets out of control.

2. Warm-Up Before Lifting

As with any strength training exercise, warming up is crucial to prevent injury. Perform a light cardio session and dynamic stretches to prepare your muscles for heavier lifts on the Smith Machine.

3. Use Appropriate Weight

Start with lighter weights to master your form and increase the load as you become more comfortable. It’s important not to overestimate your ability and risk injury.

4. Focus on Form and Technique

Even though the Smith Machine provides stability, it is essential to maintain proper form throughout the movement. Poor posture or improper technique can still lead to strain or injury.

Conclusion

The Smith Machine is a versatile and valuable tool for strength training, offering increased stability, safety, and the ability to perform a wide range of exercises. Whether you’re a beginner looking for a safer way to lift or an experienced lifter seeking to isolate specific muscle groups, the Smith Machine can enhance your workout routine. However, like any piece of gym equipment, it’s essential to use it correctly and in combination with other exercises to ensure balanced development and reduce the risk of injury.

The Air Bike: A Guide to the Ultimate Fitness Machine

johnbowe.info – The Air Bike, commonly referred to as the Assault Bike, is a robust piece of fitness equipment that has gained immense popularity in gyms, CrossFit boxes, and home workout setups. Known for its simplicity, durability, and effectiveness, the Air Bike stands out from traditional stationary bikes due to its unique design and the intense full-body workout it provides.

In this article, we will delve into the details of the Air Bike, exploring its features, benefits, workout strategies, and tips for maximizing its use. Whether you’re a beginner looking to get into shape or an advanced athlete seeking an intense cardiovascular workout, the Air Bike can be a versatile and powerful tool for reaching your fitness goals.

What Is an Air Bike?

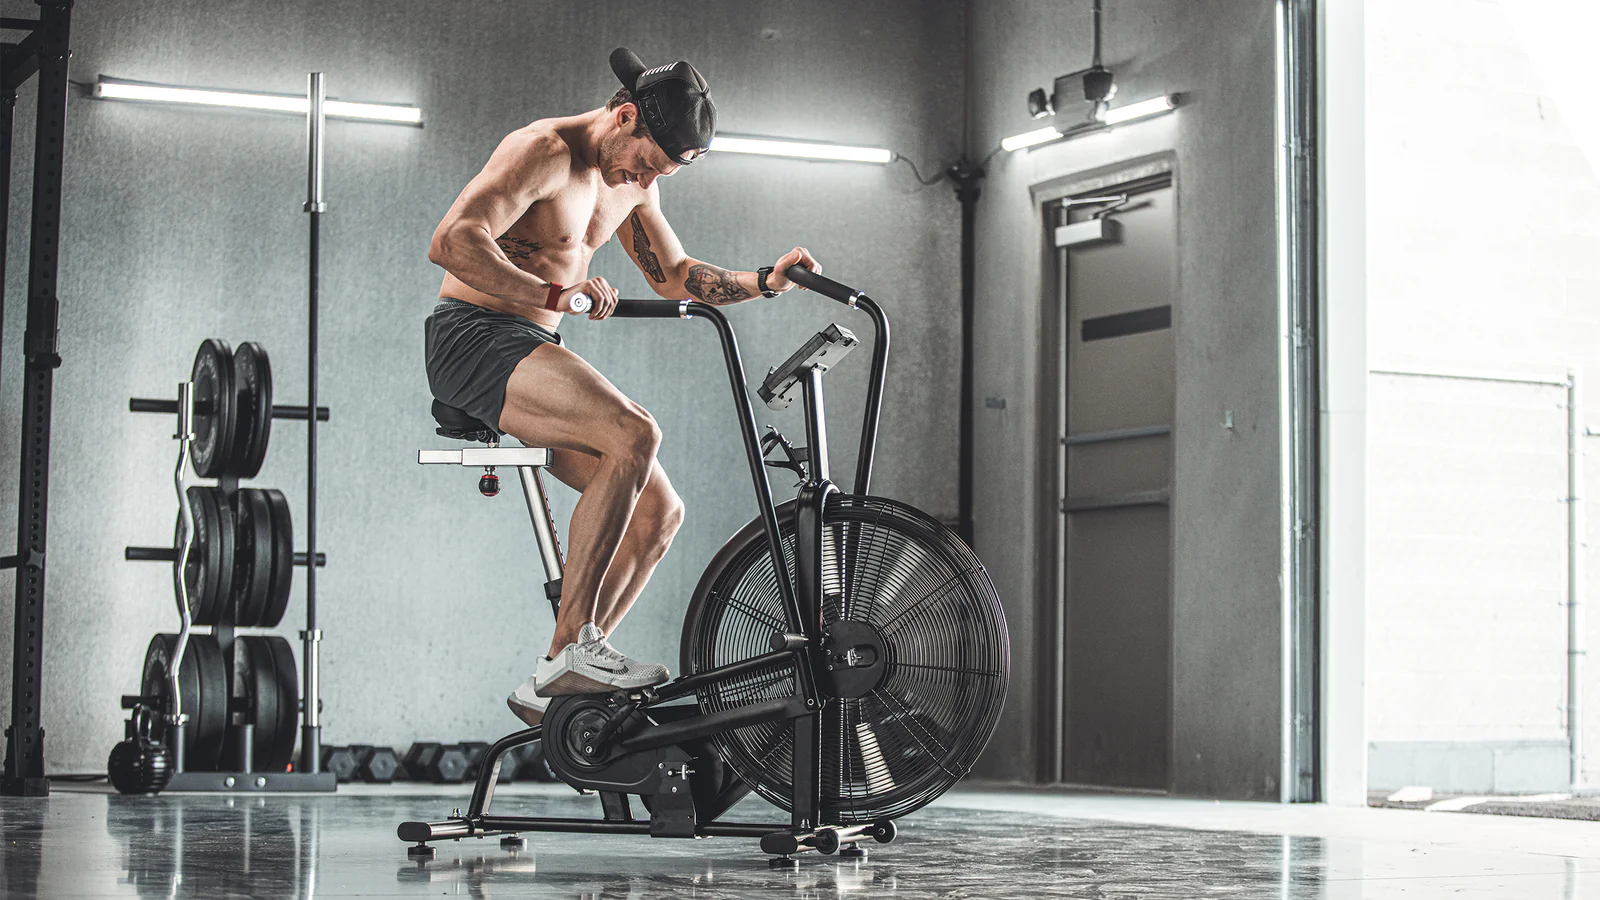
An Air Bike, also known as an Assault Bike, is a type of stationary exercise bike that uses a large fan to create air resistance. Unlike traditional exercise bikes, which rely on mechanical resistance systems like magnets or friction, the Air Bike’s resistance increases as you pedal faster and push harder. This makes it ideal for high-intensity interval training (HIIT) and other forms of intense cardiovascular workouts.

The Difference Between Air Bikes and Traditional Exercise Bikes

One of the key differences between an Air Bike and a traditional stationary bike is the fan-driven resistance. On a traditional bike, resistance is manually controlled through dials or digital settings. On an Air Bike, the harder you pedal, the more resistance you face due to the air resistance generated by the fan.

In addition to using the legs for pedaling, the Air Bike incorporates moving handlebars, allowing users to engage their upper body by pushing and pulling simultaneously. This dual-action motion sets it apart from other exercise bikes and contributes to its reputation as one of the most effective total-body conditioning machines.

Benefits of Using an Air Bike

The Air Bike offers a wide range of benefits for individuals looking to improve their cardiovascular fitness, endurance, and strength. Whether you’re using it for general fitness, sports conditioning, or weight loss, the Air Bike delivers impressive results in a relatively short amount of time.

1. Full-Body Workout

Unlike traditional exercise bikes, the Air Bike provides a full-body workout. The combination of pedaling with the legs and pushing/pulling with the arms engages muscles throughout your entire body. This includes your quads, hamstrings, calves, glutes, shoulders, chest, back, and core. The continuous engagement of multiple muscle groups makes it highly efficient for both strength and endurance training.

2. Scalable Resistance

One of the standout features of the Air Bike is its scalable resistance. The harder you pedal or push, the more resistance is generated. This means that the bike automatically adjusts to your effort level, making it suitable for all fitness levels. Beginners can start with a moderate pace, while elite athletes can push their limits by ramping up their speed and power.

3. High-Intensity Interval Training (HIIT)

The Air Bike is often used in high-intensity interval training (HIIT) due to its ability to quickly elevate heart rates and provide an intense workout in a short amount of time. HIIT workouts involve alternating between short bursts of maximum effort and brief recovery periods. The Air Bike’s resistance mechanism is perfect for this, as it allows you to switch between high and low intensities seamlessly.

4. Low-Impact, Joint-Friendly Exercise

Despite its intensity, the Air Bike offers a low-impact workout, making it easier on your joints compared to activities like running or jumping. The smooth pedaling and arm movement reduce the risk of joint stress, which is particularly beneficial for individuals with knee, ankle, or hip issues. This makes the Air Bike a suitable option for both rehabilitation and high-performance training.

5. Calorie Burn and Weight Loss

If you’re looking to burn calories and shed body fat, the Air Bike is one of the most effective tools available. Because it engages both the upper and lower body and allows for high-intensity intervals, the calorie burn on an Air Bike can be significant. A 20-minute workout can burn upwards of 300-400 calories, depending on your intensity level, making it ideal for weight loss programs.

6. Versatility

The Air Bike’s design and functionality make it highly versatile for a variety of workout styles. Whether you’re doing sprints, steady-state cardio, or integrating the Air Bike into a circuit workout, it can accommodate your needs. Additionally, it’s a great tool for recovery workouts, as it allows for gentle movement that promotes blood flow without adding too much stress on the body.

Key Features of an Air Bike

The Air Bike’s design is simple yet highly effective. Below are some of the key features that make it a favorite among fitness enthusiasts:

1. Fan-Based Resistance System

The large fan at the front of the bike is the most distinctive feature of the Air Bike. As you pedal and move the handles, the fan blades spin, creating wind resistance. The harder you work, the more resistance you encounter. This fan-based system not only provides resistance but also helps cool you down during intense sessions.

2. Dual-Action Handles

The Air Bike is equipped with moving handles that allow for a pushing and pulling motion, engaging your upper body along with your legs. This dual-action system turns the Air Bike into a full-body workout machine, targeting muscles in the arms, shoulders, and back while also giving your legs a good workout.

3. Adjustable Seat

Most Air Bikes come with adjustable seats, allowing users to find the optimal position for comfort and efficiency. This is especially important for ensuring proper form during workouts, as the correct seat height minimizes the risk of injury and enhances performance.

4. Durable Frame

Built for heavy use, Air Bikes typically feature a durable frame made from steel or other high-quality materials. This ensures the bike can withstand intense sessions and last for many years, even in commercial gym environments.

5. Built-In Console

Many Air Bikes come with a digital console that displays workout metrics such as time, speed, distance, calories burned, and heart rate (if equipped with a heart rate monitor). These metrics can help track your progress and motivate you to push harder during your workouts.

Popular Air Bike Brands

Several fitness brands manufacture Air Bikes, with some models being more widely recognized due to their performance and durability. Below are a few of the most popular brands:

1. Assault Fitness

Assault Fitness is known for its Assault Bike, one of the most commonly used Air Bikes in gyms and CrossFit competitions. The Assault AirBike is celebrated for its solid construction, smooth operation, and reliable performance.

2. Schwinn Airdyne

Schwinn has been a trusted name in the fitness industry for years, and their Airdyne series of Air Bikes is known for its durability and ease of use. The Schwinn Airdyne features a more ergonomic design and is favored by many for both home and gym use.

3. Rogue Echo Bike

The Rogue Echo Bike is another highly popular choice, especially among CrossFit athletes. Known for its heavy-duty construction and smooth, quiet operation, the Echo Bike is built to withstand the rigors of intense training while offering an exceptional riding experience.

How to Use an Air Bike Effectively

Using an Air Bike effectively requires more than just hopping on and pedaling. To maximize the benefits, it’s important to understand proper technique and how to structure your workouts.

1. Focus on Full-Body Engagement

While it’s tempting to rely on your legs to do most of the work, remember that the Air Bike is designed for full-body engagement. Push and pull the handlebars with equal force, keeping your core tight for stability. This will help you generate more power and burn more calories.

2. Interval Workouts

To get the most out of your Air Bike sessions, try incorporating interval training. A common HIIT workout involves alternating between 30 seconds of maximum effort and 1 minute of recovery for 10-15 rounds. This type of workout is highly effective for burning fat and improving cardiovascular endurance.

3. Steady-State Workouts

If interval training isn’t your style, you can also use the Air Bike for steady-state cardio. Set a goal for time or distance, and maintain a consistent pace throughout the workout. This is a great option for building endurance and aerobic capacity.

4. Set Realistic Goals

It’s important to start with realistic goals, especially if you’re new to the Air Bike. Begin with shorter workouts (10-15 minutes) and gradually increase the duration and intensity as your fitness level improves. Tracking your progress on the bike’s console can help keep you motivated.

Air Bike Maintenance and Care

Like any piece of fitness equipment, the Air Bike requires regular maintenance to ensure its longevity and performance. Here are a few maintenance tips:

1. Regular Cleaning

After each workout, wipe down the bike with a damp cloth to remove sweat and dirt. This helps prevent corrosion and ensures a smooth operation of the moving parts.

2. Lubrication

Keep the chain or belt drive system well-lubricated to prevent wear and tear. Check the manufacturer’s guidelines for the recommended type of lubricant and frequency of application.

3. Check for Loose Bolts

Periodically check for any loose bolts or screws and tighten them as needed. This ensures that the bike remains stable and safe to use.

Conclusion

The Air Bike is a versatile, challenging, and highly effective fitness tool that can benefit individuals of all fitness levels. Whether you’re looking to improve your cardiovascular health, build strength, or burn calories, the Air Bike delivers results. By incorporating it into your workout routine, you can enjoy a full-body workout that targets multiple muscle groups while boosting endurance and overall fitness.

With proper use, maintenance, and dedication, the Air Bike can become a staple in your fitness journey.

Ocean’s Bounty: A Guide to Delicious Seafood

johnbowe.info – Seafood, a gift from the ocean, has been a staple in human diets for centuries. With its diverse range of flavors, textures, and nutritional benefits, it’s no wonder that seafood has captured the hearts and palates of people worldwide. In this article, we’ll delve into the wonderful world of seafood, exploring its culinary diversity and nutritional value.

The Nutritional Powerhouse

Seafood is a nutritional powerhouse, packed with essential vitamins, minerals, and lean protein. It’s a rich source of omega-3 fatty acids, which are known to promote heart health, brain function, and reduce inflammation. Additionally, seafood provides essential nutrients like iodine, selenium, and vitamin B12, which play crucial roles in various bodily functions.

A Global Culinary Delight

Seafood has been a central part of culinary traditions across the globe. Here are some of the most popular seafood cuisines:

  • Japanese Cuisine: Renowned for its emphasis on freshness and simplicity, Japanese cuisine offers a wide array of seafood dishes, including sushi, sashimi, and tempura.
  • Mediterranean Cuisine: Mediterranean cuisine celebrates the bounty of the sea, incorporating fresh fish, shellfish, and seafood stews into its dishes.
  • Southeast Asian Cuisine: Southeast Asian cuisine is known for its bold flavors and diverse seafood offerings. From Thai curries to Vietnamese pho and Indonesian satay, seafood is a key ingredient in many regional dishes.
  • American Cuisine: American cuisine offers a diverse range of seafood dishes, from classic clam chowder and lobster rolls to modern fusion cuisine.

Tips for Cooking Seafood

  • Freshness is Key: Always choose fresh seafood with a pleasant smell and vibrant appearance.
  • Gentle Cooking Methods: Opt for gentle cooking methods like grilling, broiling, or steaming to preserve the delicate flavor and texture of seafood.
  • Seasoning with Care: Use simple seasonings like salt, pepper, lemon juice, and herbs to enhance the natural flavors of seafood.
  • Proper Storage: Store seafood properly to maintain its freshness. Refrigerate fresh fish and shellfish and freeze them if you plan to store them for longer periods.

Seafood Safety

To ensure food safety, it’s essential to handle and prepare seafood properly:

  • Thorough Cleaning: Clean seafood thoroughly to remove any dirt or impurities.
  • Proper Storage: Store seafood at the correct temperature to prevent bacterial growth.
  • Cooking to Safe Temperatures: Cook seafood to the appropriate internal temperature to kill harmful bacteria.

By following these tips and exploring the diverse world of seafood, you can enjoy delicious and nutritious meals that are both satisfying and healthy.